Showing posts with label After Effects Year 2. Show all posts

Saturday, 9 April 2016

Animation Showreel

For the final After Effects session of the year we were instructed to create a showreel featuring our project work. 

When sequencing our work we were told to follow a certain order to make the showreel appear at it's best:

- Start with good project
- Second project - favourite project
- The middle projects should show your skills
- Things not sure about don't put them in
- Build towards end
- Finish with something you want to talk about

Other things we had to make sure of were that our project clips were saved at full quality, and also to cut our visuals to our selected audio.

When we opened After Effects the first thing we did was import the audio we wanted to work with. We then created our final composition first, by selecting new comp and naming it 'final comp for a show reel'. We then dragged the audio to the timeline. 

We then began to edit the audio, opening up the audio layer to see the wave form. The requirement for the audio was that it lasted 30 seconds and had a good beat that we could cut our work to. 

We also learnt some keyboard shortcuts to make editing faster for instance using the J and K keys move the playback head jump from one marker to the next on the audio file.

We then went in to Illustrator to create our Title and Endboard artwork. The title had to be 3-5 seconds long and feature your name and surname and 'showreel 2016'. The end had to include the ©Copyright  University of Huddersfield, and a the vimeo link to our blog. 

Here are the files I created in Illustrator: 


We then looked at animated our title and end board once in After Effects, making sure to check that the text was in the boundaries using action safe.

We then selected our renders and imported them to after effects. Working in the main comp with audio in, we added the title and end board. We could also split our projects up to make the showreel more interesting, i did this for one of my projects splitting it and showing it at the end and at the beginning. 

Here is the final outcome of my showreel:


Thursday, 3 March 2016

Animated Info-graphics


The focus of this After Effects session was to create an animated info-graphics piece of work, based around a fairytale/story of our choice. As I was absent from the session I asked what the techniques covered in the session were and what type of outcome we were expected to produce. The two new techniques covered were 'tilt shift' , where the composition slightly tilts, and wipe transitions. I applied the wipe transition to my work but not the tilt shift effect as I did not feel that it worked within my animation. 

Starting out, even though I had received an explanation of the session, I was unsure whether I would be able to create something in After Effects from the start, on my own, as I wouldn't say I am completely confident with the software. I tried to prepare artwork in Illustrator that I was happy with so that if the animation side of things wasn't too good at least the artwork would look OK. 

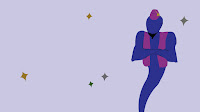
To begin with I created 3 different pieces of artwork based around my chosen story of Aladdin. One scene that would be the first 5 seconds, a wipe scene, and a second scene for the last 5 seconds. Here is what I created in Illustrator:


I then imported my illustrator artwork in to after effects and added some animation to my assets, as well as adding type, which I added an animation preset to. Once I had done this for each scene I then rendered all the compositions. Then in a new project I imported the work as footage and moved the length of each piece of footage so the wipe scene was one second long and I placed this above the two other scene, overlapping them both, and made sure the size of the footage for the others scenes was 5 seconds. 

After this I struggled a bit with the wipe transition and was unsure if I needed to apply a transition supplied by after effects or if there was an effect I could use on my wipe footage. In the end I decided to change the opacity, so it was 0% at the beginning and at the end of the one second and 100% in the middle of the second, to make the transition between the first and second scene obvious but not too harsh. I am still unsure if this is the correct way of doing it but visually it works okay, even if it is not the best. 


Here is what I managed to produce:


Overall, considering I completed this task on my own I think visually it kind of works, although it is a bit basic, and maybe the animation skill could be better and improved. One thing I am pleased with is how I now feel a bit more confident working with after effects as I took some time with the software and had to do some things twice, which gave me practice.

Tuesday, 9 February 2016

Visual//stylistic references for animated infographic workshop

These are some stylistic references I have gathered for my upcoming animated info-graphics session.
Depending on what kind of info-graphic we are to make hopefully some of these visual references will help my design.


Coffee Consume from Rodel Borja on Vimeo.


TakePart: Participant Media - Waiting For 'Superman' - Infographic from Jr.canest on Vimeo.


Bill Gates: How online courses can radically improve education by 2030 from Ivan Kander on Vimeo.

Thursday, 4 February 2016

Using Cameras and 3D Space in After Effects - development work

Following on from the session I decided to develop my piece of work by making the 'London Eye' object within my video clip rotate. To do this I reopened my original Illustrator artwork file and added another layer. I then copied the 'stand' of the wheel and pasted it on to the new layer, deleting the original stand on the other layer. Now with the wheel and wheel stand on separate layers, I would be able to rotate the wheel itself in After Effects.

At first I thought about how I would get the new Illustrator artwork in to After Effects and was unsure about how to do this. At first I tried to just replace the footage with the new Illustrator file but that did not work, and after a few attempts I did it by keeping everything the same but just importing the new Illustrator file with the wheel layers separated in to the comp as well, - retaining the layers- then dragging the wheel stand layer in to the timeline. I then pre-composed the layer so it had the same texture fill as the wheel layer. I also made the layer so it could be manipulated in 3D space like the other layers by selecting the cube icon.

To rotate I went in to the transform drop down and selected the rotate in Z axis, and added a key frame at the moment the wheel came in to focus, then moved the playback head to the end and added one there too. At first I changed the end rotation value to 360 degrees, but as the wheel was turning too fast (I wanted it to be slower as it is the London Eye) I adjusted the value until it was at a speed I thought worked best. 

Here is the outcome of my developed work:


3D work in After Effects rotating wheel from Libby Howker on Vimeo.


One thing I am pleased with is how I managed to work with After Effects on my own and figure things out without instruction as I feel not very skilled in using After Effects, and I am also pleased with how the rotation works in the first moments you see the wheel, but then I feel because of the carriages attached to the wheel spokes, the rotation movement looks a bit odd and the angle doesn't really look right. Also at one point the wheel stand looks as though it is not connected to the wheel when the camera is pulling back which is something that would need to be fixed if I revisit this.

Thursday, 21 January 2016

Using Cameras and 3D space in After Effects

In this workshop we learnt about how to create a '3D' 10 second clip and how to use cameras in After Effects. Creating 3D work in After EFFects is a particular style where 2D objects exist in 3D space.

Our stylistic and process reference for the session was the music video for MGMT - All We Ever Wanted Was Everything, which can be seen here:


MGMT - All We Ever Wanted Was Everything from oneedo on Vimeo.


We began by preparing our assets in Illustrator. One thing we had to make sure was correct was the order of the layers- the objects in the background being at the bottom of the layer stack and the objects in the foreground being at the top. Also we had to stretch the art board so that all objects were inside the board so that in after effects when the camera pulls back the correct portion of the images can be shown. We then saved this file as a stretched art board version so the original could be kept as well.


We then opened After Effects and imported our material by going to Menu - Import - Composition - and selecting 'retain layer size' so that all the individual layers were imported. We then arranged the composition settings so that the fps was 25 and the duration was 10 seconds.

We then prepared the layers. In the timeline we made sure the switches were visible on the toggles/switches and modes. We then clicked on the cube icon which allows the layers to be manipulated in three dimensions. 


We then learnt about the different coloured arrows and what they mean, for instance the green arrow - Y - moves up and down. After this we set up two views on the screen horizontally, the view on the right being the top camera and the one on the left being the active camera. 

Then we looked at how to use the cameras.  With the main comp selected we clicked - layer - new - camera - and chose 35 or 50 mil camera and the type being two node camera. When animating using camera the Position and point of interest of camera are the aspects to focus on. On the camera layer we then selected Transform. We the hovered over the bottom point of the camera and moved this to the top of the art board, we then added a keyframe on the point of interest and position options. 


After this we moved the playback head to the end of the timeline and moved the camera point down until the whole scene was in focus, adding a keyframe here as well.


If the clip was moving too fast we could spread out the layers to make them be revealed more slowly. We also learnt that if if you want to move objects around, get the camera to move up or around objects, changing your views - lift up X axis a bit so it goes over the object. 

Once we had gone over the use of camera we then focused on the visual aspect of the clip. The artwork need to come back to original Illustrator artwork. If your artwork had lost quality you could select the diagonal solid line to make it the highest quality and less fuzzy. We also had to make sure all objects were in the frame. At this point I realised that if I had separated my London Eye object layers in Illustrator then I could have a rotating wheel, however I had put the wheel and stand on one layer so I would need to go back in to Illustrator and separate these layers to allow this. 

Adding textures:

Taking inspiration from the MGMT reference, we were told to select around 6 subtle textures to use. We selected File - Import - textures in one folder - Open, and then created smaller comps within the main comp, something that is done in complex projects, called Precomposing. 

To do this we selected a layer, went to layer menu- precompose, and called the pre comp 'Texture pre comp', and selected 'leave all attributes in main comp'. We then double clicked in the comp and dropped the texture in to the background. Then in the toggles/switches and modes we selected track mattes then 'alpha matte'. (Making sure the texture was placed under the layer/precomp). Everything done in the pre comp will show up in the main comp. 


To add the 'flip up' effect:

Firstly we selected a layer to work with, then chose a point in the timeline where  we wanted the effect to start reveal. To apply the effect we went to Effects-distort- CC Page Turn, then in the controls selected Classic UI - controls where it starts from- then to control the angle  we input -180 degrees. We then dragged the cross hair to the bottom and off the screen, activating the keyframes where it said 'fold position'.
We then moved the playback head and dragged the cross hair to the top so everything was fully revealed. If you wanted to you could change the opacity and colour of the back of the 'paper'. 


 Here is my final clip:


Using cameras and 3D space in After Effects from Libby Howker on Vimeo.


Overall I am quite pleased with my final outcome, and think I have used the techniques shown in the session effectively, and even though I still find working with After Effects slightly challenging I managed to keep up. One thing which could improve the final outcome would be to make the wheel rotate and maybe add some audio. 

Thursday, 26 November 2015

Line Boiling and Hand Drawn Elements

In this After Effects session the focus was on 'line boiling' which is a mix between animation and motion graphics with an emphasis on visual content, not craft. Line boiling is a technique where you have a series of images, always an odd amount because of perception when looking at the images- otherwise it doesn't work and looks like a flicker or mistake.

For this reason we were asked to hand draw the same image three times by tracing the first over twice and then scan these in to use our assets. For this session we also needed a piece of copyright free audio to go with our work. I chose an instrumental piece of audio which I felt worked well with my image.

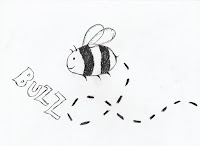
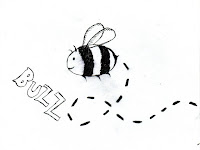
These are the drawings I brought to the session:


Once we had our images scanned in we had to set them up in Photoshop at 72 dpi, and crop them making sure they were cropped to the same size. I also cleaned my images up a bit using the Curves tool and using the same output and input numbers to make sure each image looked relatively the same. When saving our images it was important that we saved them like this:

Name_001.jpg

We then opened up After Effects, setting up a new comp with HD settings and changing the frame rate to 25 fps, and the duration to 10 seconds. The first thing we did was import our audio file. We dropped the track in to the timeline and then edited and cut the track to suit. 

Then to get our footage we went to the Project Menu - File - Import File -  then navigated to our material. We then selected all 3 images by holding shift, and imported these as a JPEG sequence. We then dragged the footage to the timeline, but as the footage was only 3 frames long we changed the setting to loop and fit. To do this we went to File - interpret footage - main, changed the frame rate to fps 25 and changed the loop setting to 50. 

This is known as 'animating in  twos' which means 2 frames per second ( animation speed not frame rate)
We then accessed the timeline options, columns, stretch and changed the speed to 200%. 

After this we imported a texture for our background, I chose a subtle paper texture for mine. We could also animate our images to move by dropping a key frame at the beginning and end. Also to make our image look like it was on whatever texture we had chosen (paper in my case) we went to layer modes and changed the 'normal' setting to 'multiply'.

We then covered a technique which makes it look like a line is drawing itself. To do this firstly we selected the pen tool and drew around the shape of the line we wanted to make look like it was drawing itself, drawing from left to right as that is how something would be drawn naturally and leaving a gap in the outline. We then went to the Effects menu and selected 'generate stroke', selecting the 'all masks button' and where it says colour we chose one different to anything used so far so it could be seen. We then had to make the brush size cover all the lines so it fits all the lines on each image.

Next we animated the lines and created the mask. We changed the 'end' value to 0% then activated the key frame, dragged the playback head to wherever we wanted the image to be fully drawn and made this 100% on 'end'. I added this effect to my word 'buzz' but did not add it to the final clip because I had not done the word as a separate JPEG file, so when I played it back the effect worked, but my bee image had disappeared.

The final technique we looked at was how to apply a 'fake boil' effect using Illustrator and After Effects, we tested this by creating a simple shape on Illustrator and copying this in to After Effects. Then to add the fake boil effect to shape layers you go to the drop down contents - add  - wiggle paths. I didn't really like this effect though so did not include it in my final clip, I didn't find it looked very effective or added anything to the animation.

Here is my final outcome of the session:


Boiling from Libby Howker on Vimeo.

Monday, 2 November 2015

Rotoscope in After Effects


For this session we needed to bring two things to the session, one being a short piece of copyright free footage that looped and we had to make sure the subject of the footage was not obscured as we needed to cut out the whole figure for the roto scoping. We also were asked to prepare a background created in Illustrator for the subject of the footage to feature in. 

I found it quite difficult to find a suitable piece of footage that was copyright free even though I looked on multiple websites. I ended up with a looping video of an antelope/gazelle type animal found on a royalty-free footage website although when I downloaded it still featured a watermark so to rectify this and to avoid copyright issues I filled in animal figure using the track mat feature to change the work.  
For the background I created a desert/grass plain landscape, and added in a tree and some water as I wanted to place more animals in the setting to make it more interesting which I may still do if I can find suitable royalty free footage.


In the session we were shown an example of rotoscoping (rotoscoping is an animation technique in which animators trace over footage, frame by frame, for use in live-action and animated films) used in a Kylie Minogue music video where multiple version of her have been essentially 'cut out' and placed in the same background/setting. 


The first thing we did was import our footage as mine was a video I imported 'as footage'. We set the frame rate to 25 fps and made the video have a 2 second duration. To do this we had to slow the footage down and stretch it by going to Paragraph- column- stretch and changing the value to 200.

We then had to pick which frame would be our first one when rotoscoping, something where all the limbs had been extended and were visible was suggested, we then had to press the star key (*) to mark this layer. After we had done this we went to the After Effects drop down menu at the top and went to preferences- general- then unticked the 'preserve constant vertex and feather point count when editing masks'. This mean that we could now alter the points on each individual frame and therefore have greater accuracy in cutting the subject out.

We had to the begin drawing round our cutting out our figure. We used the pen tool for this, and selected the layer, moving the playback head at the star marked point, and were instructed to try and use as few points as possible around the shape. This part was quite time consuming, and difficult at times when the limbs were crossed over for example.

We then looked at mask tools and functions. We went to the mask option, drop down menu where the 'add' option would remove the background and the subtract option would do the opposite. We then selected the animate mask property and selected mask one, activate mask path.

We then saved the project and went to the mask selection and chose add. Then we selected on the mask path and held down the control key and clicked on any frame. A drop down menu appeared and we selected 'toggle hold key frame'. This meant the subject of our footage was now able to be placed in the background we had created. Next we created a new composition with a duration of ten seconds, which was the composition from which we would then be able to output the video. Firstly we dragged our original composition in to the timeline, then imported the backgrounds we had created previously. 

To make our rotoscoped figure loop within the 10 second comp we used time remapping. To do this we selected layer - new - time - enable time remapping. We then added a new key frame and added an expression to loop. We used the expression dictionary and selected menu- property - loop out - duration. This allowed us to extend motion for the duration of the timeline. The final thing we looked at was using track mats to add colour/texture to our rotoscope figure, making sure the colour/texture sat below the rotoscope layer and was the size of the comp.

Overall I found this session quite challenging and managed to keep up with instruction only by writing down everything as it was said so then I could refer back to it. I think the techniques we learnt were quite useful although I prefer the rotoscoping in Photoshop session we did last year as it seemed more simple than doing it on After Effects. As for my outcome I am fairly happy with how it turned out but would maybe like to have tried making it so the animal figure looked as though it was walking across the landscape, not just in the same position over and over.


Wednesday, 30 September 2015

Loops and Living Holds

   For the first After Effects session of second year we looked at 'loops and living holds'. A motion loop is a piece of motion that starts and finishes in the same place. They are useful for looping backgrounds. A living hold is a production tool. The session was an opportunity to re-cap skills learned in year 1, and develop some more complex approaches to the software. The session covered key-frame and motion techniques and working with textures. The outcome of the session would be a short animation loop, using a portrait of our design. 
Prior to the session we were asked to create a simple portrait image (head and shoulders) drawn or traced in Illustrator. Separate elements of the figure had to be placed on different layers so they would be able to move independently when imported in to After Effects. 
Here is my portrait that I drew on Illustrator:


As well as bringing a vector portrait to the session we also had to bring about 5 to 6 textures to the lesson with subtle textures working best I chose textures of paper and fabrics.


The piece of animation that inspired the workshop was Andrew Allen's"The Thomas Beale Cipher", which featured simple vector style portraits and also layered textures and motion loops. 

The first thing we did was import our Illustrator work in to After Effects, making sure to select the retain layer sizes so each layer from Illustrator would be imported. We then set up the composition to HD settings: 1920px by 1080 px, and set the frame rate to 25 frames per second.

Once we had done this we then rigged each layer by moving the anchor point to the point at which we wanted the element to animate from. After this we used the parent tool to attach all layer to the appropriate parent layer, which meant that , for example, the hair moves with head when the head is animated.

We then looked at adding motion to the timeline, one layer at a time by using the rotation and position properties, under the transform option and activating the keyframes by clicking the stopwatch icon. As well as this we looked at using a tool called the 'wiggler' found under the Window menu. As the name suggests the tool creates a slight 'wiggle' movement to an element you choose to animate. The number of wiggles per second (frequency) determines the kind of movement you create, as well as the magnitude (size of the wiggle) that you choose. I opted for more subtle movements and applied the wiggler tool to both the rotation and position properties. 

We also touched on coding in After Effects, and learnt that an equals sign turns an expression on or off and that expressions always override key frames. To activate expressions you must hold down the alt key and click on the stop watch button. The code we learnt was something that would do the same thing as the wiggler but would be done using text instead of key frames, to do this we deleted the text already there and typed: wiggle (5,50) the values in the brackets indicating the frequency and magnitude. Although this was interesting to learn I prefer just working with key frames.

To finish off we added the textures we had gathered by placing the texture as the background then using track mats which make layered objects become textured objects. We had to make sure the texture was positioned underneath the chosen layer we wanted to texture in the layer stack and scaled it so it was bigger than the layer. Then we selected layer modes and chose 'alpha mat' which essentially 'pushes' the texture though the object. 
I added a texture to the background of my video which was a subtle paper texture, I couldn't find the right textures for the character portrait and I liked the colours I had used so didn't want to use a texture that wasn't going to add anything to the animation but I may go back to this work yet and try more textures.

Here is the finished video: