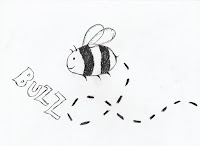
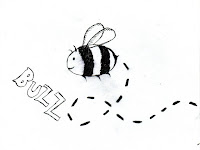
For this reason we were asked to hand draw the same image three times by tracing the first over twice and then scan these in to use our assets. For this session we also needed a piece of copyright free audio to go with our work. I chose an instrumental piece of audio which I felt worked well with my image.
These are the drawings I brought to the session:


Once we had our images scanned in we had to set them up in Photoshop at 72 dpi, and crop them making sure they were cropped to the same size. I also cleaned my images up a bit using the Curves tool and using the same output and input numbers to make sure each image looked relatively the same. When saving our images it was important that we saved them like this:
Name_001.jpg
We then opened up After Effects, setting up a new comp with HD settings and changing the frame rate to 25 fps, and the duration to 10 seconds. The first thing we did was import our audio file. We dropped the track in to the timeline and then edited and cut the track to suit.
Then to get our footage we went to the Project Menu - File - Import File - then navigated to our material. We then selected all 3 images by holding shift, and imported these as a JPEG sequence. We then dragged the footage to the timeline, but as the footage was only 3 frames long we changed the setting to loop and fit. To do this we went to File - interpret footage - main, changed the frame rate to fps 25 and changed the loop setting to 50.
This is known as 'animating in twos' which means 2 frames per second ( animation speed not frame rate)
We then accessed the timeline options, columns, stretch and changed the speed to 200%.
After this we imported a texture for our background, I chose a subtle paper texture for mine. We could also animate our images to move by dropping a key frame at the beginning and end. Also to make our image look like it was on whatever texture we had chosen (paper in my case) we went to layer modes and changed the 'normal' setting to 'multiply'.
We then covered a technique which makes it look like a line is drawing itself. To do this firstly we selected the pen tool and drew around the shape of the line we wanted to make look like it was drawing itself, drawing from left to right as that is how something would be drawn naturally and leaving a gap in the outline. We then went to the Effects menu and selected 'generate stroke', selecting the 'all masks button' and where it says colour we chose one different to anything used so far so it could be seen. We then had to make the brush size cover all the lines so it fits all the lines on each image.
Next we animated the lines and created the mask. We changed the 'end' value to 0% then activated the key frame, dragged the playback head to wherever we wanted the image to be fully drawn and made this 100% on 'end'. I added this effect to my word 'buzz' but did not add it to the final clip because I had not done the word as a separate JPEG file, so when I played it back the effect worked, but my bee image had disappeared.
The final technique we looked at was how to apply a 'fake boil' effect using Illustrator and After Effects, we tested this by creating a simple shape on Illustrator and copying this in to After Effects. Then to add the fake boil effect to shape layers you go to the drop down contents - add - wiggle paths. I didn't really like this effect though so did not include it in my final clip, I didn't find it looked very effective or added anything to the animation.
Here is my final outcome of the session:
Boiling from Libby Howker on Vimeo.
