Cinema 4D - considering as a design/visual tool
-workflows and techniques
-using illustrator first and how to bring in to cinema 4d
- dynamics and particle systems
new- a4 document illustrator view - rulers- move zero to the right place - on rulers- top left corner- cross hair - click and drag until in the middle- green dot comes when it's in the middle
create text - make big - type - character needs to be closed path
type - create outlines object- ungroup
each object - closed path
File - save as - logo - illustrator 8 - ok
quit illustrator
Folder structures
how to save and archive:
-project folder
-new folder 'project folder'
-3 folders inside
-1 for cinema 4d
-1 for artwork (logo)
-1 for output
Open cinema 4d - setting up- (orange buttons at top considered with rendering) (right one - render settings - custom settings - dropdown arrow, options, print, a4, portrait - change to landscape). change measurement from cm to mm, 300 dpi for quality. ignore film aspect. frame range - select current frame - ok.
- light grey -> renderable area
- right hand side - object box
select 'mode' - then 'view settings' - change attributes at bottom - go to view menu - tick action st... set to 95% - working edge round document.
- can change tinted border to 50 % for visibility
-save it out - file - save as - desktop - project folder - cinema 4d - template - then save again as 'logo' - the one to work in. put illustrator file in to artwork folder in project folder.

- 'Import' is 'Merge'
-File - Merge- find logo file- open
- Dialogue box - what scale- leave at 1 cm - ok
Should get a white outline indicating logo shape when selected
- Select in list at top right hand corner 'logo' - attributes - coordinates- select and hit zero - right click on little arrows to 'Zero Out'/
At this point we quick saved out work.
- Go to list, little box plus, opens components of group 'hierarchical structure', different letters, different paths - keep grouped to move as one object.
- Test render is left orange button in top button bar. At this point nothing showed in the test render. Parametric objects can only be rendered.
-Illustrator logo needs parameters.
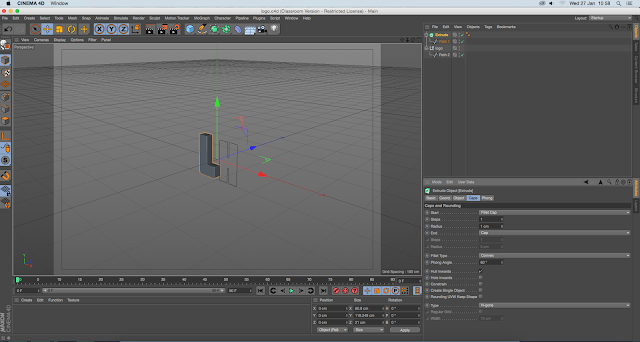
-Select one of the paths in the group - add extrude object- two green objects at top shelf - subdividing surface- rounded cube - little arrow. We needed 'extrude'. Drag path in to 'extrude' object. Drag right on top of extrude object. Object should change in view port.
-At top right side - arrows move object. Big arrow zooms in and out, round arrows - turn round, big square and little square changed view port - opens it out - top, side, front view.
-Click in list on extrude object - parameters seen below - 'movement' - thickness of object - click and drag on arrow head changed thickness.
-If test render can see object now.
-Hard edges on object not desirable - ways to soften.
-In extrude object go to Caps tab, start and end add Fillet Cap - adds bevel. Change radius to 1. Adds another dimension to design.

*
-Select extrude object - cmd + drag - delete path to then add a new path to it so it has the same settings.
- If single line - drag on to copied extrude object.
-In Cinema 4D there is a text option 'Motext'.
- Making logo one object - drag objects out of extrude - right click on 3 object - connect objects- delete - drag now one object in to first extrude object and can delete others.
- Once happy save file
-Under Mograph select Motext.
- Object two - depth - same as movement option in extrude
- there is also a type box to type text in to
- If go to caps tab - save settings - fillet cap - 3 steps on each end
-Soft edge on type
- Click on pen tool and hold - options come up
- Pen tool just like in Illustrator, never do in perspective viewpoint
- There is a text tool but flat like artwork brought in from Illustrator
- Add circle - change radius, add ring, second radius, extrude
- When moving object in view port use red,green and blue arrows - constrains to axis, so doesn't move everywhere.
-Adding colour and background
-Setting up backdrop/ ground object
- along top shelf - create button bar - create landscape- lots of options - select background - text render shows flat background
- Creating shadows needs something to reflect off
- Add floor object - conceals objects - move object up (logo and text) click and drag all object in list (text, logo, ring) right click - group object, easy to move at once
- Use green arrow head and move up logo
- Adding colour - at bottom of right window in left hand side - create material by double clicking
-If you click material a dialogue box appears - basic - colour - go to basics tab -can add more attributes like glow, alpha etc, but we just went to colour tab.
- Change to RGB, HSV
- Drag material to object in the list (floor for example). Name material by clicking yellow box beneath material at bottom. 'Floor'
- Drag colour/material to background- when rendering you see different colour of background to floor even though they are the samr colour.
*to get white - double click material - white isn't white because of shadow - drag to floor/background to replace colour. Go to basic tabs, switch off colour and luminescence to get true white.
How to create ramped background:
- Compositing tag - putting layers together
- Composite the background
- Floor selected in top window - tags - cinema 4d - tags - compositing tag
- Tick top box
- Background and floor should now be joined together
(see in render)
- make sure you can see horizon.
- Create some more colours - add to objects - to separate elements just drag colour to whatever object you want it to be on.
Adding lighting and shadow:
- Can create studio lighting setups.
- Add camera first - hold position of design work - change view point on lights camera shot.
- On top shelf - Camera
- Set up artwork so it looks how you want
- Don't move after you've created camera
- Set up with view port settings you've got in place
- Can see camera in background if rotate around
- In list next to camera - little white box with X in - click this - switched camera on and off. If white - you're looking through camera - if move you will lose it
- basic 3 point lighting system
- Click light bulb. everything goes black. need to position light. lift green arrow up - red to left hand side. Always have light over left-hand shoulder in photography.
- Shading added to object - see in text render
- Double click light and rename 'key' (key light)
- Add shadows - settings under general under colour box, change shadow to shadow maps over - attributes, mode, view settings, view - right at the bottom, tick box that says 'shadow'.
-Go back to light, coordinates - X,Y,Z. Click and drag arrow heads, want shadow to come on to right hand side - looks harsh - filled in with other light. Even shadows out with fill light:
-Copy light (cmd and drag) key light- call it 'Fill', in top window port use red arrow move across to other side of camera. Go in to eneral and turn off shadows.
- shadow softened up
- Turn intensity of light down on 'fill' to 50%
- Go back to key light - right now both white light - change light to slightly blue. 207 degrees, saturation at 5%
- Go to fill light - change to slightly yellow , 5% yellow
- blue and yellow add warmth and colour: makes light look interesting
- 'Volumetrics' - bloom around light - select key - visible light - volumetrics visibility - top view port - circle around light, can drag to make bigger using outer drag buttons, only works with darker colours for background
- Visibility - subtle, positioned behind camera
- do the same to fill light = other side
- changing % makes bloom more obvious
- Save file
- How to render image out:
- Right hand orange button, set up output - current frame, save button -> format - jpeg
depth - 8mm, set up options: 95 %
click OK.
File - project - folder - output folder - Save
Close dialogue box, click middle orange button to render - go to output folder- open image in preview- will see quality image - full effects of bloom and light visible.
***
I found the pace of this session quite fast and having never used Cinema4D before it felt like quite a lot to take on at first which is why I focused on note taking all the steps so I could refer back to the instructions. Although this helped me it also meant that within the session I managed on the first task of creating the logo and did not get to adding light or a ring round the text or adding additional text. This is something I want to try, also note taking and the fast rate at which the instructions were given meant that I didn't take as many screen shots of the process which for the purpose of this blog post means that visually there is nothing much interesting to show.


