Saturday, 10 June 2017

Research & Development sessions - Jekyll and Hyde project

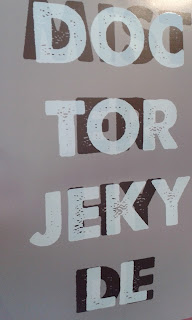
I decided to try out printing on the UV printer for my typographic response. Firstly I had to make sure the white coloured type was made black and the other layers removed, so that the printer can identify the black bit and only spot-print that part. The background were flattened and printed first, and then the spot colour was printed last. I then decided to add a glossy varnish finish to the white type to add a reflective quality. The print was printed on to slightly glossy card.


The first attempt didn't go according to plan as the centre position was in the wrong position -


The second attempt worked properly after adjusting the printer settings, the above photo shows the first layer  (the background and dark text) being printed.


Above: the spot text being printed, before the glossy varnish was added.

Final print, with the reflective gloss showing:


Thursday, 20 April 2017

Research & Development sessions - Jekyll and Hyde project

After creating the image response for the project I moved on to the typographic requirement. I decided to have the type overlapping to show both the words Mr Hyde and Doctor Jekyll entwined, reflecting the character. I tried out different fonts and colours -


Saturday, 18 March 2017

Research & Development sessions - Jekyll and Hyde project

From my research I have decided to create a pattern based on elements from the novel - Dr Jekyll's potion and the mirror that is mentioned in the book. After creating the original sketch and creating the repeating pattern image, I tried out different colour variations.

Original sketch:


Coloured sketch:


Repeating pattern: 


Colour variations:


Tuesday, 17 January 2017

Research & Development sessions - Coding with Spencer


This coding task involved making letters appear, and ordering them, as well as changing sizes and forming sentences, using 'if' commands and X and Y coordinates.