We used various tools including the clone stamp, transform tool, magic wand tool and carried out colour changes. The first thing we did was line up the screw image to the bottom of the light bulb, we then 'cleaned up' the light bulb image so the screw and the bulb looked right together, and the middle part of the bulb had been erased so the stick could be placed there.
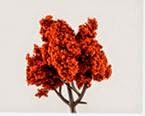
We then added the top of the tree to the stick and changed the colour to a green, by going to 'layer' then 'adjustments' > hue/saturation.
Here is my finished task:
Overall I found this session quite useful as I learnt about some features properly in Photoshop that I hadn't considered before but can now apply to future work in Photoshop.


